| Anchor | ||||
|---|---|---|---|---|
|
| Anchor | ||||
|---|---|---|---|---|
|
...
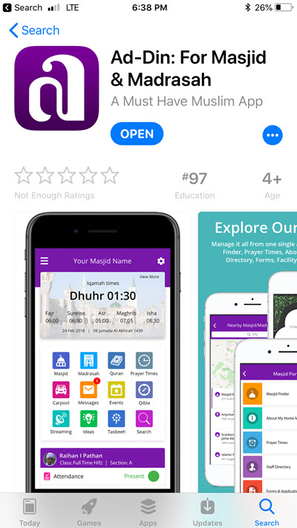
- Download the App from your relevant app store such as Google Play store or Apple App store.
After successfully download, Open the Ad-Din App

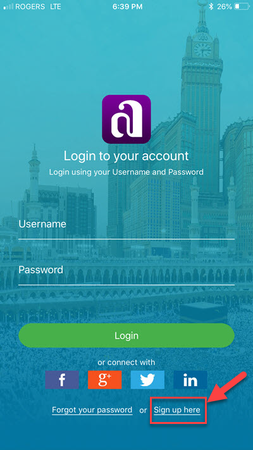
You will be prompted for Credentials to login, but we will sign up for a new account by tapping on to Singup here in the bottom right corner.
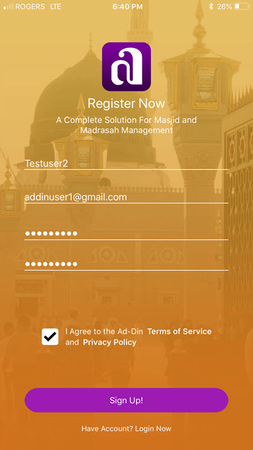
- Enter the Username of your choice and it must be unique
- Enter your email address, small students can use their parents email
- Enter the password of your choice, make sure it is complex enough for your own Security.
- Check to Agree to the Terms and Privacy and tap on Signup button!
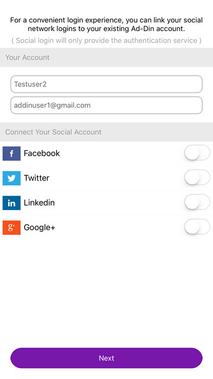
- You can link your Social Media Account here which will allow you to login using your social media account credentials next time onwards. (Social Login only provide us the Authentication service and no other information, so you can login using multiple credentials to the same account in cases you are comfortable using them than a separate account)
- Tap on Next when ready
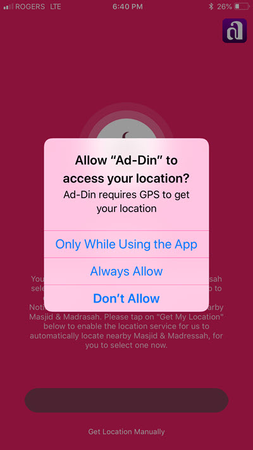
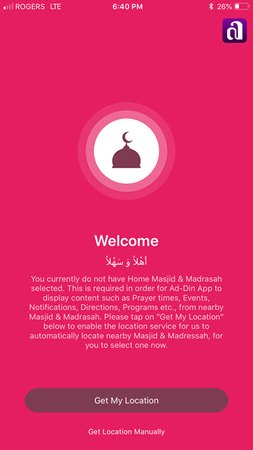
- On this screen Enable the location service, our app heavily depends on the location service to display the Masjid/Madrasah around you.
- After allowing the Location Service, tap on Get My Location, this will search for nearby Masjid/Madrasah and show you the list to chose them as your Home Masjid / Madrasah.
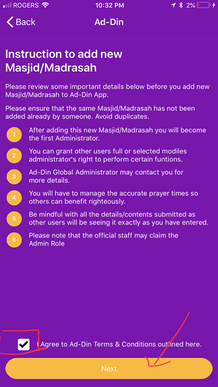
- At this stage if you are one of the Imam, Principal, staff or Board member of your Masjid/Madrasah and would like to add your organization to Ad-Din, tap on Add New from left bottom corner, which requires additional steps & efforts to configure the Masjid/Madrasah services.
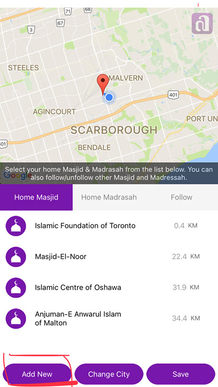
- If you are NOT an Imam, Principal, staff or Board member of your Masjid/Madrasah Click here.
- We highly recommend adding Both Masjid & Madrasah even if your organization don't offer the Madrasah Service, as they are quite tightly integrated in our app, and are required for it to function well.
- If you or your organization only offer Madrasah service and decided to only Add Madrasah than ensure to select nearby Masjid as your Home Masjid on step 15 and Save, then tap on Add New, similarly if you decided to only add Masjid than select any nearby Madrasah as home Madrasah on step 15 Save and then add New.
- Select Both or as mentioned in step 17,18
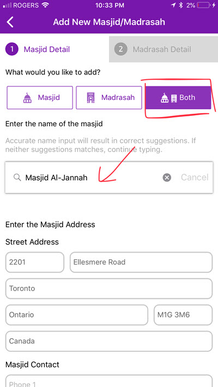
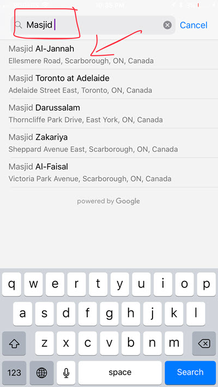
- Enter the name of your Masjid and google autofill assist will kick in and help locate the name from around the world.
- Select the Name from auto complete offering from google or Enter the Name as desired and fill in the Address Manually, if selected from the Google Autofill it will fill the address as available from google for you.
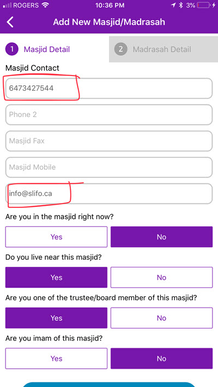
- Next enter the accurate phone number and active email of your Masjid
- Answer the questionnaire,
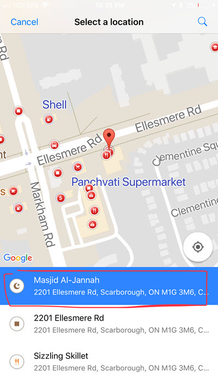
- when you select NO in the first question "Are you in the Masjid right now?" it will give you popup with the location selector from the Google. Ensure you pick the right location as it will be utilized by Muslims for accurate directions to your Masjid/Madrasah.

- After ensuring all the details are correct, tap Next, will give you successful message of Masjid Addition.

- Now on the Second tab same way you will need to fill the details for Madrasah
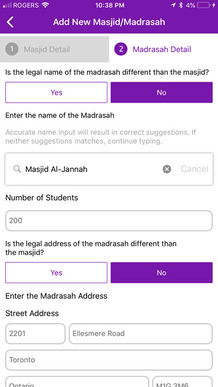
- Answer the questionnaires appropriately, (If you were not adding Masjid you will have to enter the Name of the Madrasah which will give you Google autofill suggestion, if not found Type in the Desired name and fill the Address.
- If you answer No to "Are you in the Madrasah right now?" you will be prompted to select the location on the map. Ensure you pick the right location as it will be utilized by Muslims for accurate directions to your Masjid/Madrasah.

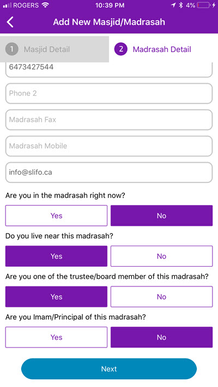
- Enter the accurate Madrasah Contact Details tap on Next
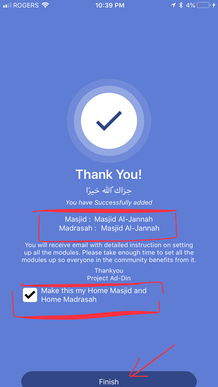
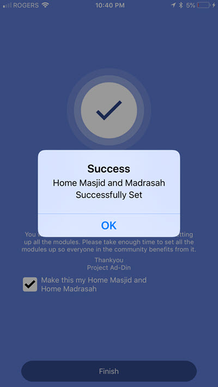
- Check the box make this your Home Masjid and Home Madrasah. If you were only adding Masjid you will only see Masjid here as you have already selected and saved the Home Madrasah on Step 15 similarly if you were only adding Madrasah you will only see Madrasah here as you already selected and saved the Home Masjid on step 15.
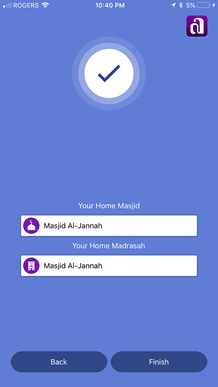
- Your Newly Added Masjid/Madrasah will only appear in the list or map for other to choose only after it's approved and validated by Ad-Din Administration.
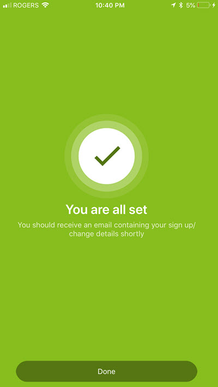
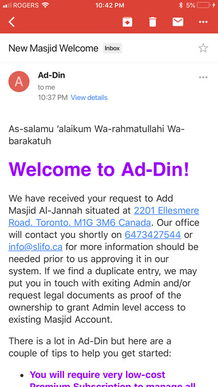
- You will receive three emails at this stage.
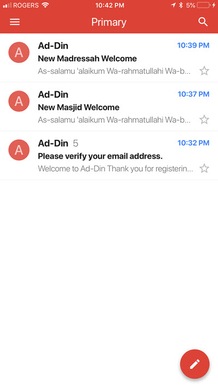
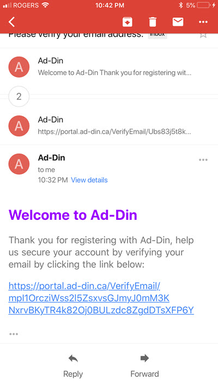
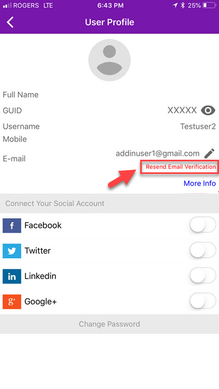
Validate your email first, this is must else you will not receive the future communications via email. Do as soon as possible as the link expires in few hours. If the link got expired, you can resend the verification link from Settings page from the mobile.
Second Welcome email for Masjid and third Welcome email from Madrasah, do ensure to read them thoroughly.

- You can also follow other nearby Masjid/Madrasah to get updates from there as well, but this is optional.
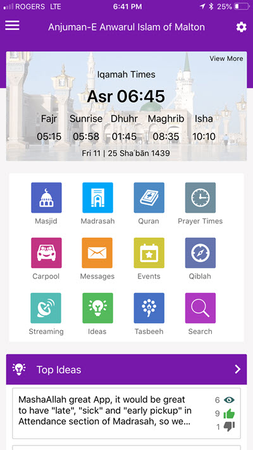
- This is how your Ad-Din Masjid/Madrasah App Home Screen would look like.
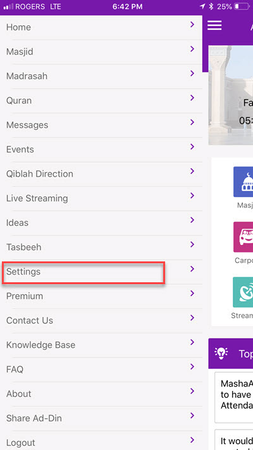
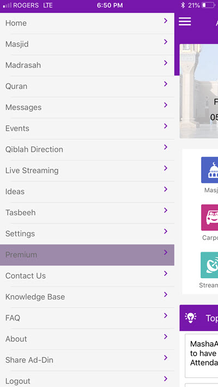
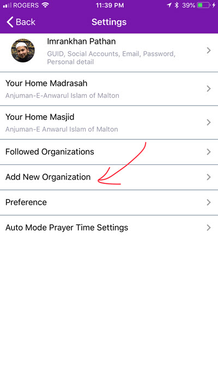
- Swipe your finger on the Mobile Device from left to right, from the Drawer Menu select Settings
- Being an Admin your personal information must be upto date, it will only be visible to You and other Admin within the Organization so rest assured its secured, without this details Ad-Din Admin will not approve the Organization Accounts you just added, tap on at the top where it says GUID, Social Accounts, Email, Password, Personal Details.
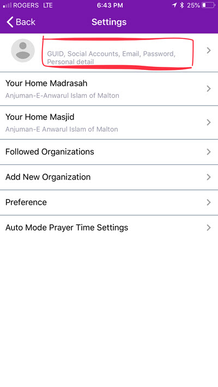
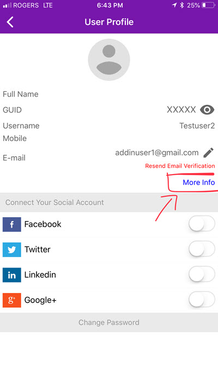
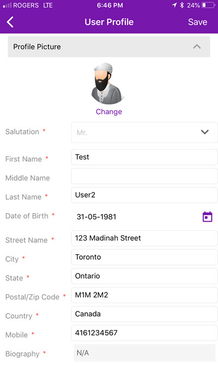
- Tap on More Info, fill the General details accurately. And tap on Save on top right corner
- Tap on Back button twice to go back to home screen.
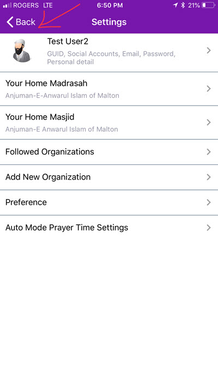
- You are all set.
- Being Admin of these newly added Masjid Madrasah, this step is Mandatory for you to keep up and update all the details of your organization so everyone can benefit in the community. It also supports us, so we can continue to improve and add more value to this app for you, our Masajid/Madaris and whole Muslim community through this app can benefit Insha'Allah. Please subscribe to Premium Version at very minimal cost, which will enable the Events, Messages Center with Push Notification, Madrasah, Carpool and other Administrative features for your account. It will enable the complete Madrasah Module which is one of the biggest module in the App for you to start configuring. Premium subscribers will also receive priority support and all new modules we may release in future.
- Swipe from left to right on your screen, from the drawer menu select Premium.
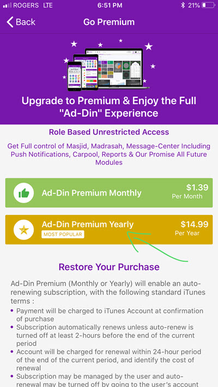
- Choose from our low cost Monthly or Yearly plan. With an introductory price for first month or year at 0.99$ or 9.99$ a year.
- After Subscribing to premium, first things first as an Admin you have to update the Prayer times and other details, here are the two checklist to get you going
- Our doors are open and lights are ON feel free to open a support ticket by clicking here and we will be happy to assist you with a smooth onboarding.
- Jazakallahu Khairan for your support
...
- It will launch the same Wizard as mentioned in[ step 18 above.|#_If_you_don’t]
- Follow through the step 18 to 71 above to add new Masjid/Madrasah.
- After a successful addition ensure to choose from our low cost Monthly or Yearly plan. With an introductory price for first month or year at 0.99$ or 9.99$ a year.
- After Subscribing to premium, first things first as an Admin you have to update the Prayer times and other details, here are the two checklist to get you going
- Our doors are open and lights are ON feel free to open a support ticket by clicking here and we will be happy to assist you with a smooth onboarding.
Team Ad-Din