Introducing All NEW Powerful Madrasah Fee Payment Reconciliation Module. Whether the parent pays the Madrasah Fees by Preauthorized Bank Payment, Cash, Cheque, Credit-Card or Other, with Ad-Din Solution, you have the luxury to reconcile them all under one roof.
...
Frequency-based fully automatic invoice generation with robust class-wise or organization wise sibling discount handling.
Automated Fee payments reminder to parents.
We have Automated the payment receipts.
Record fee payments either from Ad-Din Mobile App or Web.
Compelling Accounts Receivable and Aging report at your fingertip.
Your Accountant makes a single entry to the primary book/system.
Note: This module do not offer Payment Gateway to process the actual payments, instead it relieves the administrative burdens around it.
...
Payment Type is responsible for generating regular invoices
To create payment type Navigate to Madrasah > Admin Portal > Payment from the left menu
Click on Payment Type Tab
Click on + Add
Name: Give a meaningful name to Payment Type i.e. Grade 4-7 Monthly Fee
Class: Select the relevant Classes
Amount: enter the numeric fee value i.e. the program monthly fee is 350$
Frequency: Weekly, Monthly, Yearly or One time
Payment From: Select the date from when this Payment type is effective from, invoices will only being to generate from this date on a selected due date.
Payment To: Select the date when this Payment type will end, invoices will stop being generated on this date.
Due Date:Select the due date of the fee, an automatic Invoices will be generated for all the Students in the selected classes for the specified amount minus discounts if any.
NOTE:Automatic Reminders are sent to parent next day. The Payment Reminders are automatically sent for any Unpaid or Partially paid invoices to parents next day of it is actually due.Automated payment due reminder Notification email and Push Notification looks like below.


Rule: Select the applicable Discount Rule, for more info see Discount Rule section above.
Description: Write any description explaining the Payment Type setup
If there are any exception to this Payment Type click on Exception + icon on top right corner, expand the class and select the student and enter the different amount, these students invoices will be different from rest i.e. some students cant afford and if an organization has given any break to the parents.
Validate the settings and click on Save.
Saving will immediately generate two month invoices, one for current month and one for next month.
NOTE: You can not generate/add Historical invoices, this is an automation solution hence only current month and future invoices will be generated. For any historical invoices you can generate one time invoices using One Time Payment Type. For any help with this open a support case with Ad-Din Team.
...
You can modify the Discount Type any time, it will be effective immediately on any unpaid invoices. Paid invoices will remain as is.
| Note |
|---|
|
| Warning |
|---|
If you deleted the Payment Type and re-created to include the newly added classes, you will end up seeing duplicate invoices. If you run in to this issue you will have to,
Below image explains how you can distinguish between the invoices generated by two different Payment Types |
...
...
Payment
As soon as Payment Type is saved the current and future month invoices will appear on this tab.
You can filter the duration to see the past or future one month invoices.
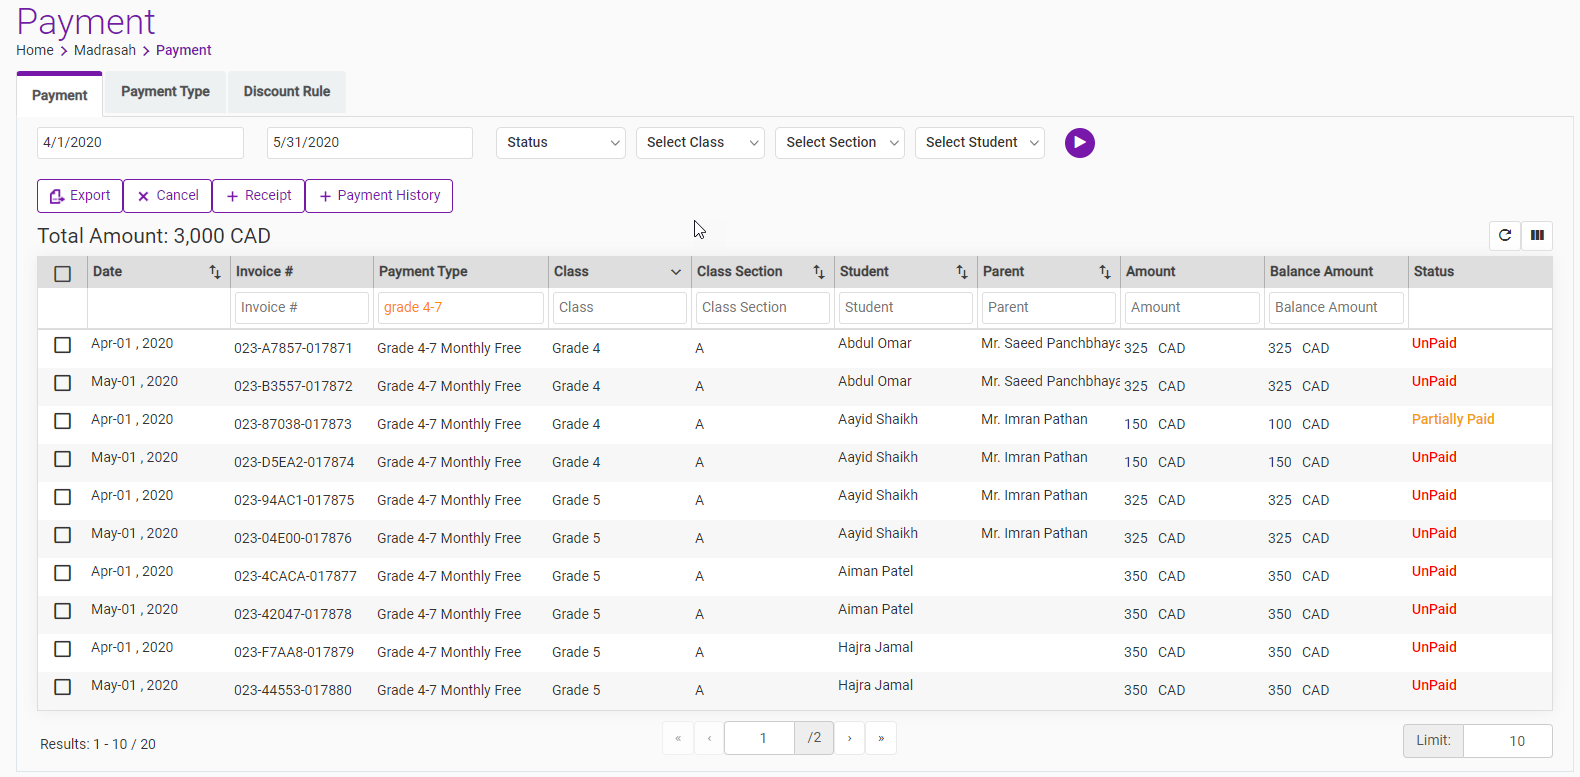
As you can see the Aayid Shaikh got 150$ invoice instead of 350$, as it was added as exception to payment type.
From this point you can either manage the Receipts from Web portal or Ad-Din Mobile App.
Recording Payments from Web Portal
Whether the parent has paid the Madrasah Fees by Preauthorized Bank Payment, Cash, Cheque, Credit-Card or Other you can mark them as following.
for example to record payment of an invoices who pays through Preauthorized Bank Payment, select the invoices then
Click on Receipt
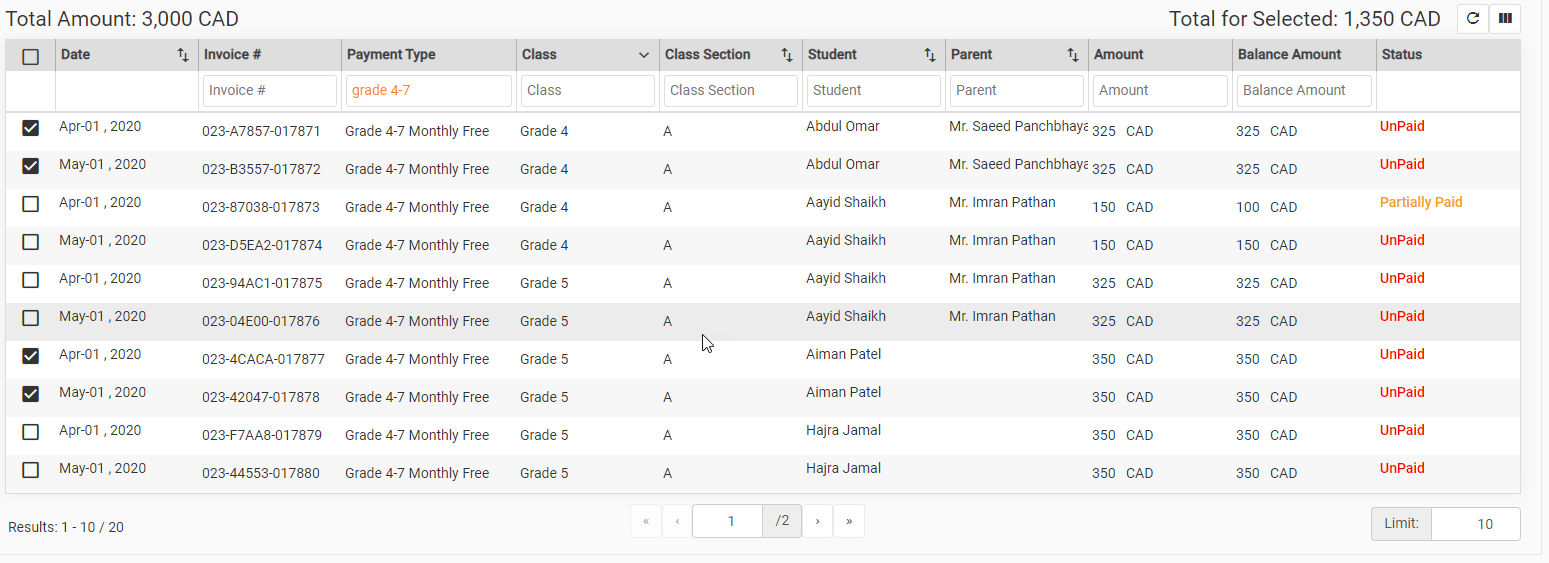
The total for selected invoices will be automatically populated, enter the date the payment was received.

Select the Payment Method “Bank Payment / Preauthorized” or an actual.
Click on Save
On confirmation page click on Proceed
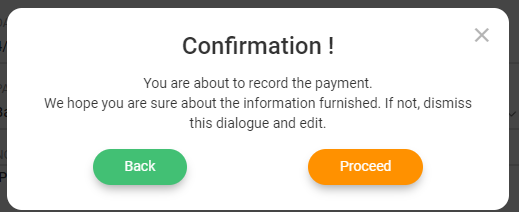
Click OK on Successfully Added popup.
Depending on the payments recorded Paid, Unpaid or Partial Paid status will appear against each invoices.

Soon the invoice payment is recorded an automated email receipt goes to parent which looks like below

...
Canceling an Invoice
In the event you have generated wrong invoices or a payment is noncollectable you can simply cancel the invoice.
To do that select the invoice and click on Cancel
Click OK on the Payment Cancelled popup.

If there are any payment record against and invoice you will get warning like this, you first have to remove the payment record to be able to cancel the payment, See removing the payment Record on an Invoice section below.

To convert the cancelled invoice back Active invoice simply select the cancelled invoice and Mark as Unpaid button will appear on top


Invoice will be sent back to the queue as Unpaid. You can now capture the payment against it whenever you receive a payment.
You can also directly mark a Cancelled invoice as paid by selecting and clicking on Receipt button instead, if payment is already received.
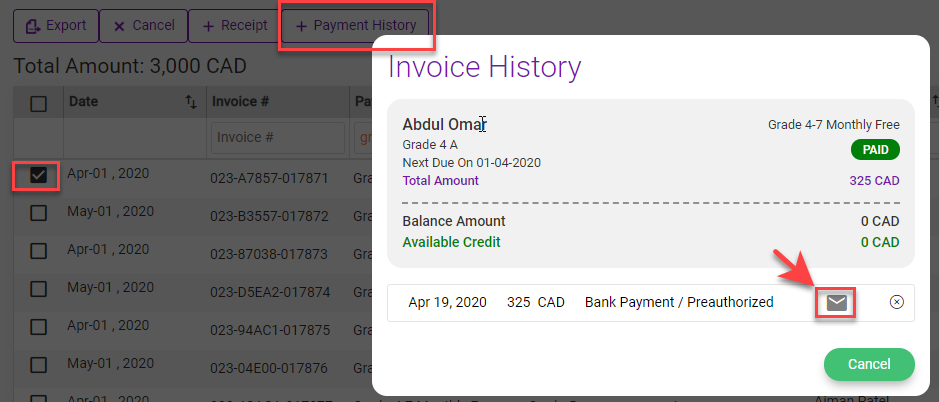
Removing the Payment Record on an Invoices
In the event you have made a mistake you can simply remove the payment record
To do that select the invoice and click on Payment History
click on X to delete the payment record

Resend the Payment Receipt
There could be number of reason to resend the payment receipt
i.e. Parent requested missing receipt
Wrong email on parent account, receipts were never delivered
Change of an invoice
You can simply resend the receipt by selecting an invoice and clicking on Payment history
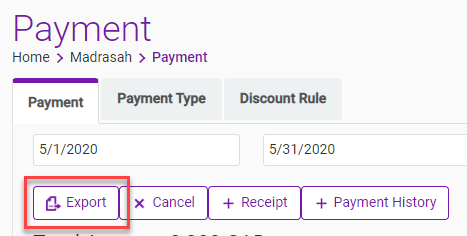
Export the list of payments
You can export the list of all the payment records by simply clicking on Export button
This will be a csv file for your record or analysis.
...